 FREE SHIPPING – AUSTRALIA WIDE





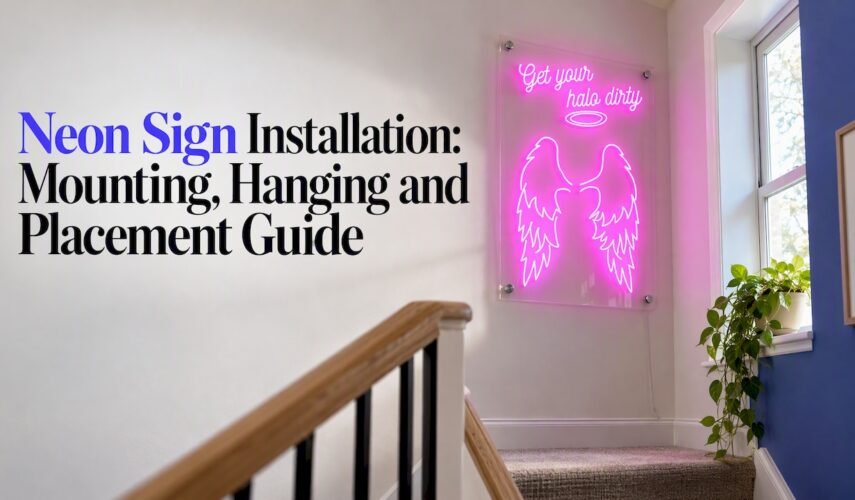
Most LED neon signs go up in under an hour with a drill, a spirit level and a power point nearby. Hang it on two or more secure fixing points, keep the weight off the tubing, and plan where the cable will run before you touch the wall. The exceptions are outdoor signs, hardwired commercial signs and anything over a public footpath. Those involve electricians, councils and safety rules, and we cover them below.
This guide is for homeowners, event hosts, cafe and bar owners, retailers and shop fitters who have a sign on order, or are about to order one, and want to know how it gets onto the wall.
TL;DR
- A plug-in LED neon sign is a straightforward DIY job: mark the wall, drill, fit anchors, hang on at least two points and tuck the cable away.
- Renters can hang lightweight signs with adhesive hooks rated well above the sign’s weight, or use a shelf, a window or a freestanding stand instead of drilling.
- A hardwired commercial sign must be connected by a licensed electrician under AS/NZS 3000:2018.
- Permanent outdoor or illuminated signage can need council approval, so check your local planning portal before ordering.
- Settle placement first: wall type, power point, viewing distance and glare decide how good the sign looks.
Table of Contents
- Before you pick up a drill
- Where to put your neon sign
- How to wall mount a neon sign
- Hanging a neon sign without drilling
- Hanging a neon sign from the ceiling
- Indoor and outdoor installation
- Commercial signs: electricians, safety and councils
- Common installation mistakes
- Our perspective: plan the install when you design the sign
- Choosing a sign that suits your install
- A quick pre-install checklist
- FAQ
- Sources
Before you pick up a drill
Two decisions come before any hole: where the sign goes, and how it is powered. Get these wrong and the best mounting method will not save the result.
Check what you have. Your sign arrives on a backboard, usually clear acrylic, with the LED neon flex fixed to it. How the backboard is drilled and how heavy the whole piece is both affect your hardware. Weigh the sign if you can (bathroom scales work), and check the fixing points on the backboard before choosing anchors.
Check the power. A standard plug-in sign needs a nearby power point. A sign for a shopfront or a built-in feature may be wired into the building, and that changes who is allowed to do the work (more on that below).
Test it first. Plug the sign in on the floor and check every section lights. It is far easier to sort out a fault before it is on the wall.
Tools and hardware
- Pencil, masking tape and a spirit level
- Tape measure
- Drill with the right bit for your wall (masonry for brick or concrete, a standard bit for timber or plasterboard)
- Wall plugs or plasterboard anchors rated above the sign’s weight
- Screws, spacers or standoffs if you want the sign to sit off the wall
- Cable clips or a cable cover
- A second person to hold the sign
Where to put your neon sign
Placement is the part people skip, and it is the part you see every day.
Placement at home
- Above a bed or sofa: keep it clear of heads and where it can be knocked. A sign above a bedhead should be fixed at several points, not hung from a single screw.
- Feature wall: a plain, matt wall shows neon best. Busy wallpaper competes with the lettering.
- Home bar or games room: eye level or just above, centred on the bar back or the wall behind the seating.
- Bedrooms: think about brightness. A bright white or cool tone can be a lot at night, and a dimmer helps if your sign supports one.
Placement in a business
- Viewing distance: the sign should be readable from where customers decide to come in. Stand at the door, the counter and the furthest table, and check each sightline.
- Behind the counter: a classic spot for a logo sign, because every customer faces it while ordering and it features in their photos.
- Windows: a sign in the window works as a night-time open sign, but glass reflects the light, so check what the sign looks like from the street after dark.
- Glare and reflection: avoid placing it opposite a mirror or glossy tile where it will bounce straight into diners’ eyes.
- Cable run: pick a spot where the cable can drop to a power point without crossing a doorway or a walkway.
If you are sketching a layout for a fit-out, our team can mock up a custom sign for your business so you can see the proportions on your wall before you commit.
Height and size
There is no single rule, but a handy method works well. Cut a paper template to the sign’s exact dimensions, tape it to the wall and live with it for a day. Walk past it, sit under it, view it from the doorway. Move it until it feels right, then mark your fixing holes through the template.
How to wall mount a neon sign
This is the standard method for plug-in LED neon on a solid wall, and the one most of our customers use.
- Make a template. Trace the backboard on paper, mark the fixing holes, and tape it to the wall.
- Level it. Use the spirit level across the top of the template. A sign that is 3 mm out looks crooked next to a door frame or a shelf.
- Mark the holes. Pierce the paper with a pencil at each fixing point.
- Drill. Match the bit to the wall plug. Drill slightly deeper than the plug length.
- Fit the anchors. Tap wall plugs in flush. On plasterboard, use anchors rated for the sign’s weight, or find a stud.
- Hang the sign. Have a helper hold it while you drive in the screws. Do not overtighten: acrylic can crack if you crank the screw down hard.
- Add spacers if wanted. Standoffs lift the sign off the wall so the backboard casts a softer glow around the edge.
- Manage the cable. Run it down to the power point and clip it flat. Make sure the cable does not pull on the sign.
- Switch on and check. Confirm the sign sits level and all sections light.
Wall type matters
| Wall type | What to use | Watch for |
|---|---|---|
| Brick or concrete | Masonry bit, wall plugs, screws | Drill on low hammer setting so you do not crack the face |
| Timber stud | Screws straight into the stud | Locate the stud first and check for hidden wiring and pipes |
| Plasterboard | Rated plasterboard anchors, or a stud | Anchors have weight limits, so check the pack |
| Tile | Tile bit, plugs, slow speed with tape over the mark | Tiles chip easily, and do not drill into grout lines you cannot see behind |
| Rendered or exterior wall | Masonry fixings in stainless steel | Sealed holes and weatherproof sign only |
Before drilling any wall, use a stud and cable detector, and check where power cables and water pipes run. This matters most in kitchens, bathrooms and behind bars.
Hanging a neon sign without drilling
Renters, wedding hosts and pop-up traders all ask this. You have several choices, and each suits a different sign.
- Adhesive hooks or strips: work on smooth, clean, painted surfaces and lightweight signs. Clean the wall, let it dry, and use hooks with a weight rating well above the sign’s weight. One hanging guide suggests at least two hooks so the sign stays level. Check the manufacturer’s instructions for how long to wait before hanging, and be wary on textured, dusty or freshly painted walls.
- Picture rail: if your home has one, hang the sign from rail hooks and cord or chain. No marks on the wall.
- Shelf or ledge: lean the sign against the wall on a shelf, mantel or sideboard. Fix the cable so nobody can pull the sign off.
- Freestanding stand or table-top base: common at weddings and events. Place it on a stable surface and keep it away from drinks.
- Window suction mounts: only for very light signs and only on clean, flat glass. Check regularly.
One rule applies to every method: never carry the sign’s weight on the LED tubing itself. All the load goes through the backboard.
If the sign is heavy, or hangs above a bed or a seating area, drill. Adhesive is for light pieces on good surfaces.
Hanging a neon sign from the ceiling
Ceiling hangs suit shopfronts, cafes, event spaces and open-plan homes where a wall does not work. They also take more care than a wall mount.
- Use at least two suspension points, so the sign cannot spin or tilt.
- Fix into something solid: a joist, a steel beam or a purpose-made ceiling anchor, not plain plasterboard. If you are not sure what is above the ceiling, ask a builder.
- Use chain or wire rated for the load, with a margin. Adjustable chain lets you level the sign after it is hung.
- Hide the cable along the chain or run it in a clear sleeve, and route it to a power point rather than letting it dangle.
- Check clearance. Keep the bottom edge well above head height in a walkway.
For anything over about two metres off the floor, treat it as a ladder or scaffold job, which brings us to safety rules for commercial work.
Indoor and outdoor installation
Not every LED neon sign is made for the weather. If your sign will sit outside, in a covered alfresco area, on a balcony or on a shopfront, tell the supplier before the sign is built. Using a sign that is not rated for the conditions risks moisture getting in. The Essential Services Commission in Victoria has raised concerns about LED fittings installed outdoors without the right protection, naming poor light distribution from the installation method and fire or short-circuit risks in damp conditions.
Some practical outdoor points:
- Use corrosion-resistant fixings, especially near the coast.
- Keep the power connection, plug and any transformer protected from rain and sprinklers.
- Allow for wind. A flat sign on a wall is exposed to shear and pull, so over-specify the fixings.
- Do not point a bright sign into a neighbour’s window.
Our custom business signs can be built for indoor or outdoor use, so say where it is going when you order.
Commercial signs: electricians, safety and councils
Home installs are simple. Business installs bring rules. Here is what applies in Australia.
Plug-in versus hardwired
For commercial premises, the law treats plug-in and hardwired signs differently. According to OH Consultant’s signage installation guidance, a basic sign with a standard plug can be installed without an electrician, but any hardwired commercial sign must be connected by a licensed electrician to meet AS/NZS 3000:2018, the Wiring Rules. The sign installer should not do the final electrical termination.
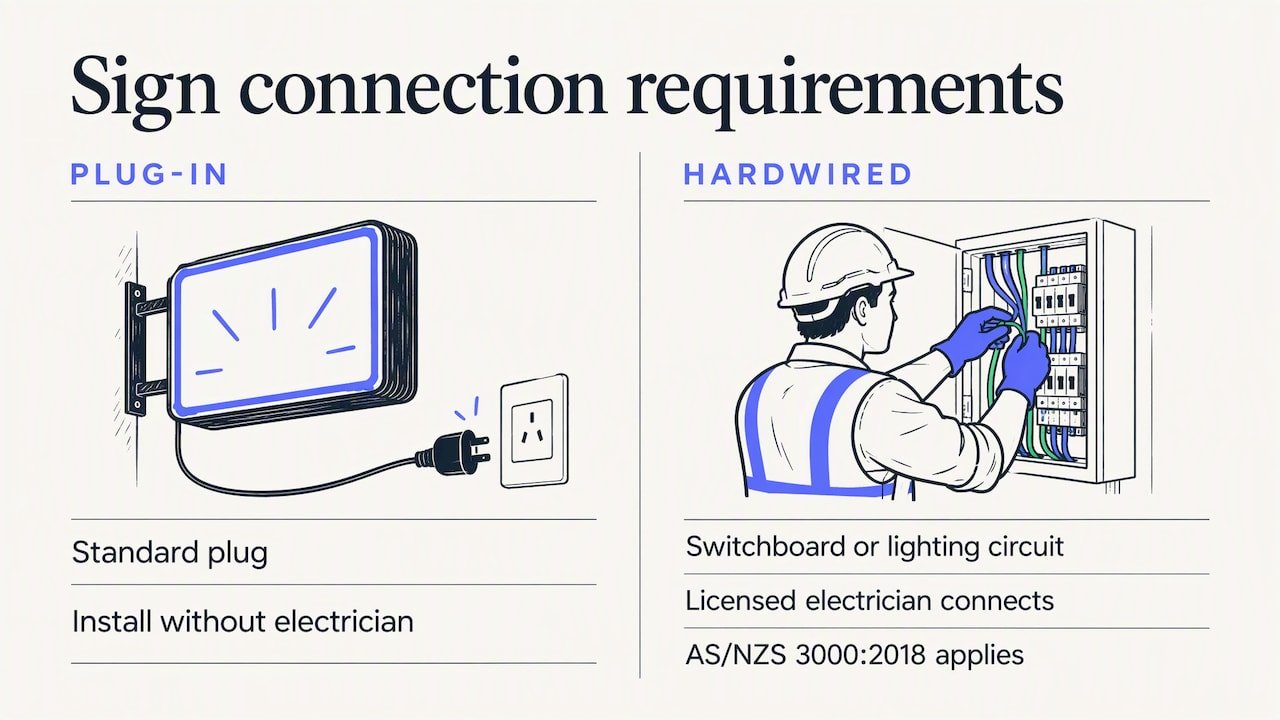
If your shop fitter wants to hardwire a sign into the switchboard or a lighting circuit, book an electrician. Do not wire it yourself.
Working at height
The same source notes that signage installation is often classed as high risk construction work in Australia when it involves work above 2 metres or next to live traffic. That requires a Safe Work Method Statement shared with the site manager or principal contractor before work starts. If you are a business owner hiring a contractor, ask to see theirs.
Council approval
Signs that are visible from the street may need approval. Rules vary by state and council. Noosa Shire Council, for example, lists the types of permanent signage that need approval, including freestanding signs, under its local law. Moreton Bay Regional Council’s conditions for temporary signs set out requirements such as clearance over footpaths and limits on certain sign types, and place responsibility for safety on the sign owner.
What that means for you:
- Check your own council’s planning portal before ordering a permanent outdoor or illuminated sign.
- Ask whether flashing or animated modes are allowed, and if not, order a steady-burn sign.
- If the sign hangs over a footpath, check the clearance requirements that apply in your council area.
- If you lease the premises, get your landlord’s written approval too.
Window and internal signs are generally simpler, but if you are unsure, ask your council or a town planner.
Common installation mistakes
- Skipping the template. Holes drilled by eye end up crooked and cannot be undone.
- Using too few fixing points. One screw lets the sign swing and stresses the backboard.
- Underrated anchors. Plasterboard plugs fail slowly, then all at once.
- Overtightening screws into acrylic.
- Forgetting the power point. A sign two metres from the nearest outlet ends up with an extension lead across the room.
- Hanging by the tubing. The tubing is not a structural element.
- Ignoring heat and moisture. Keep signs away from steamy bathrooms and kitchen splash zones unless they are rated for it.
- Hardwiring it yourself. Leave this to a licensed electrician.
Our perspective: plan the install when you design the sign
We have been making LED neon for over a decade, and the installs that go wrong rarely go wrong because of the drill. They go wrong because nobody thought about the wall, the cable or the council until the sign arrived.
So we suggest working backwards. Start with where the sign goes and what it hangs from. Is it a plasterboard feature wall in a rental, a brick wall behind a bar, or a window facing the street? That decides size, backboard shape and whether it is plug-in or hardwired. It is much cheaper to adjust a design on screen than to rework a sign on a wall.
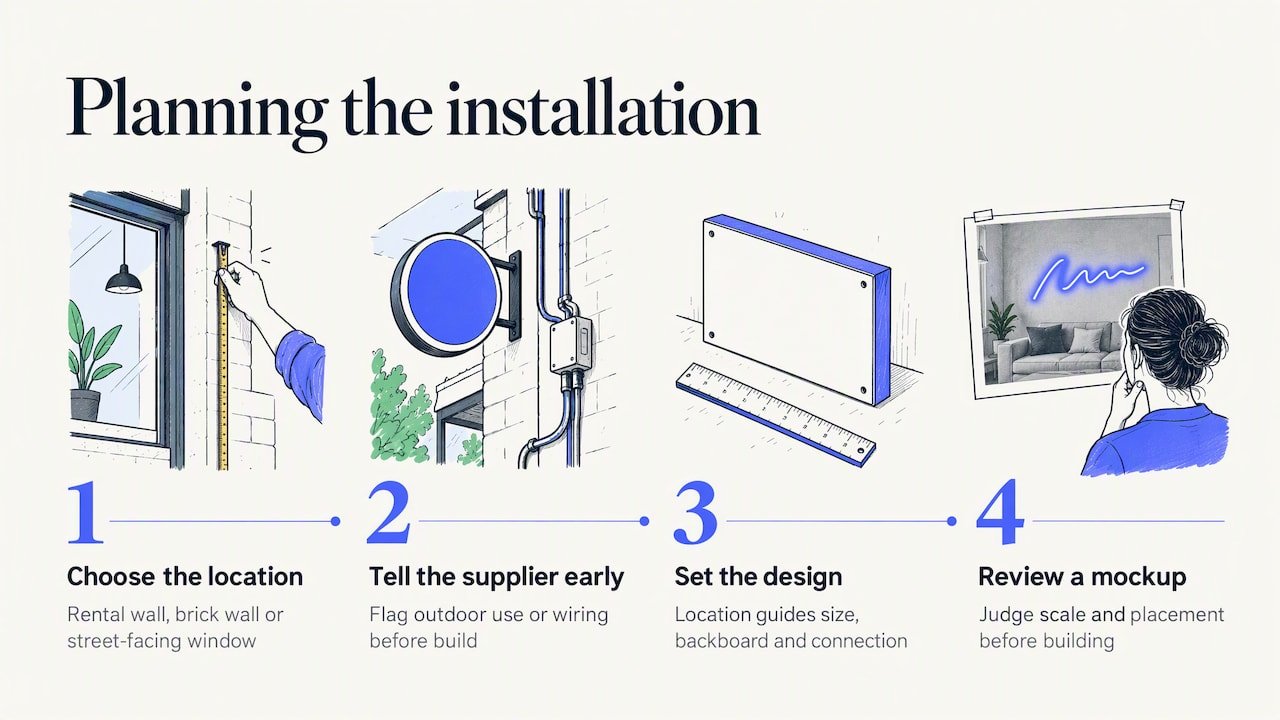
That is why we offer free design mockups. We can show your logo or idea on a photo of your space, so you can judge scale and placement before anything is built. If you already have artwork, you can upload your image or logo and we will work from it. For businesses with a fit-out underway, we work with shop fitters and builders on sizing and mounting questions, and we offer local Australian support if you need to talk it through.
One piece of advice we repeat often: if a sign is going outside, or being wired in, tell us at the start. It changes how the sign is built, and it keeps you on the right side of the electrical and council rules.
— Brett
Choosing a sign that suits your install
If you are still choosing, match the sign to the space.
- Home or wedding: a ready-made design from our range, such as Just married or Good vibes only, is quick to hang and easy to move.
- Bar or venue: browse our neon bar signs, which suit the wall behind a bar or a feature corner.
- Your own wording or logo: use Build Your Own to set the text, colour and size.
- Shopfront or commercial fit-out: start with our custom LED neon signs for businesses, and tell us the install conditions up front.
See more on our gallery for how signs look on real walls, or head to the Oz Neon homepage to start your order.
A quick pre-install checklist
- Test the sign on the floor.
- Confirm the sign’s weight and the backboard fixing points.
- Choose the wall and confirm what is behind it.
- Confirm the power point and cable route.
- Make and level a paper template.
- Choose anchors rated above the sign’s weight.
- If outdoors, confirm the sign is built for it and check council rules.
- If hardwired, book a licensed electrician.
- Hang, level, clip the cable and switch on.
FAQ
Can neon signs be hung outside?
Yes, if the sign is built for outdoor use and the fixings and power connection are protected from moisture. Tell your supplier where the sign is going before it is made. Permanent illuminated signs visible from the street can also need council approval, so check your local planning portal.
How do I hang a neon sign without drilling?
For lightweight signs, use at least two heavy-duty adhesive hooks rated well above the sign’s weight on a clean, smooth wall. You can also use a picture rail, a shelf, a freestanding stand or a window mount. Heavier signs and signs above beds or seating are safer drilled into the wall.
Do I need an electrician to install a neon sign?
Not for a plug-in sign with a standard plug. A hardwired commercial sign must be connected by a licensed electrician in line with AS/NZS 3000:2018. If you are unsure how your sign is powered, ask before you start.
Can I hang a neon sign from the ceiling?
Yes. Use at least two suspension points fixed into a joist, beam or proper ceiling anchor, and chain or wire rated well above the sign’s weight. Keep the cable tidy and the sign clear of head height, and use a builder if you are unsure what is above the ceiling.
Where is the best place to put a neon sign?
Put it on a plain wall where people naturally look, near a power point and away from mirrors and glare. In a business, choose a spot visible from the door or behind the counter. Tape a paper template to the wall first and check it from several angles.
Sources
- Signage Installation SWMS Templates, OH Consultant
- Conditions for temporary signs, Moreton Bay Regional Council
- Advertising Devices, Noosa Shire Council
- Non-building based lighting upgrades (Activity 35) update, Essential Services Commission
- How to Hang Neon Signs Without Damage on Walls or Windows, NeonChamp








0 Comments for “Neon Sign Installation: Mounting, Hanging and Placement Guide”